- Posted June 25, 2013, 9:30 a.m. - 12 years ago
Arranging PDF Content Using Grids and Guides
If you’ve used desktop publishing or image editing software, you should be familiar with the concept of grid lines and guide lines for creating and managing layouts. Both help you to align elements on the page for a more professional look.
- Grids run horizontally and vertically across the entire page, giving you a number of points to snap to.
- Guides are individual lines that are inserted manually as and when they’re needed. Multiple guides can be added on a single page; they only apply to that page and are not replicated throughout the document.
Using Grids
In Infix Pro, you can use grids in two different ways. You can use it passively as a guide, or you can switch on the snapping feature:
- View->Grid & Guides->Show Grid overlays a pale grid that you can use as a visual guide. Note: with this setting switched on, your grid lines will be printed; make sure you turn it off before sending your document to the printer if you don’t want this to happen.
- View->Grid & Guides->Snap to Grid forces objects to automatically align themselves with grid lines. This snapping works when you move an element or resize it.
Sometimes the grid lines aren’t exactly in the right place, and that makes the Snap to Grid function troublesome. But Infix Pro makes it easy to adjust the space between the lines so that the grid assists you, rather than becoming a hindrance.
- To change the grid line position, as well as the number of lines per square, open the Grid Spacing dialog box: View->Grid & Guides->Grid Spacing.
- To change the unit of measurement used in the dialog, open the Editing tab in the File->Preferences… dialog box.
Using Guides
Guides are slightly more flexible, since you can insert them only where you need them on the page. This can help to make your workspace less cluttered, and it can make it easier to align elements like text boxes, since there are fewer points that the elements can snap to.
Guides only apply to the page you create them on.
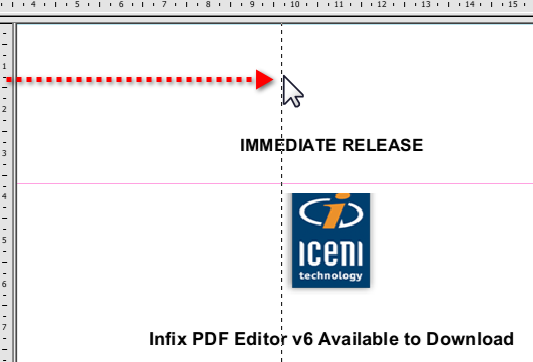
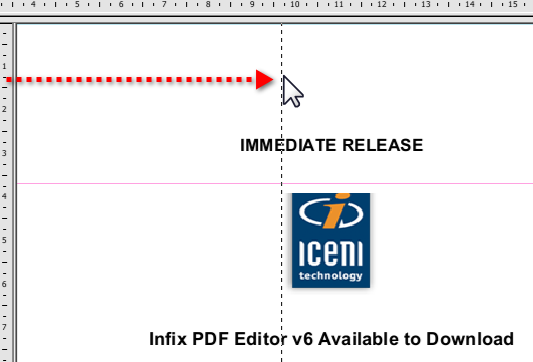
Click and drag a straight line from the ruler to create a guide. It appears on a dotted line on the page and turns red when the mouse is released.
Once a guide is added, you can’t remove it with the Undo command.
- To move a guide, click it once with the Object (arrow) tool, then drag it to its new position.
- To delete a guide, click it once with the Object tool, then press the Delete key.
Things to Remember When Saving and Printing
Grid line customisations are saved in the PDF metadata, but Infix Pro is the only application that will use that data. So each document will have its own grid line settings, providing you don’t attempt to edit it in another application.
Guide lines are only stored if Store layout in PDF is ticked within the File->Preferences… dialog box. You’ll find the setting in the Saving tab.
Also, remember that grid lines and guide lines will be printed if visible on screen. Select View->Grid & Guides->Hide Guides and/ or View->Grid & Guides->Hide Grids to disable this behaviour.
Latest Articles
-
Our latest testimonial for Infix 6
Dec. 19, 2016, 2:40 p.m. -
Most commonly translated Turkish words
Feb. 6, 2015, 9 a.m. -
Merry Christmas & A Happy New Year
Dec. 25, 2016, 8 a.m. -
New Save PDF to SVG feature introduced to Spire.Office
Dec. 23, 2016, 11:54 a.m. -
Editing educational PDFs – a user perspective
July 21, 2014, 8:03 a.m.


